This article decribes how to install and use Avonic PTZ cameras in combination with the Audio-Technica ATND1061 Beamforming Ceiling Array microphone.
First you will have to install the Digital Microphone Manager installation tool to make sure that your ATND1061 is set up correctly and working. More on this subject can be found on the product pages of Audio-Technica regarding this product.
When you have set up your microphone, the interface should show something as the screenshot below (this is a schematic representation of one of Avonic's conference rooms)
The colored rectangular shapes are the talking areas that the microphone detects when speaking from the different chairs available in the room. The little black dot is the actual sound detected by the microphone.
The fact that these coloured retangles are drawn larger than the actual size of the room has to do with acoustic influences. The microphone picks up sounds as if they are further away than they actually are. By accomodating for these offsets in the software it can correctly pick up when someone is speaking.

Each of these coloured areas represents an area for which you can create a preset in the camera. There is one little catch though, the Audio-Technica software subtracts one value from the actual preset that is called in the camera. So if you define preset 6 in the software, actually preset 5 is called inside the camera.
In the above screenshot on the right hand side you can see that the purple GR2 is calling preset 6 (camera preset number 5).
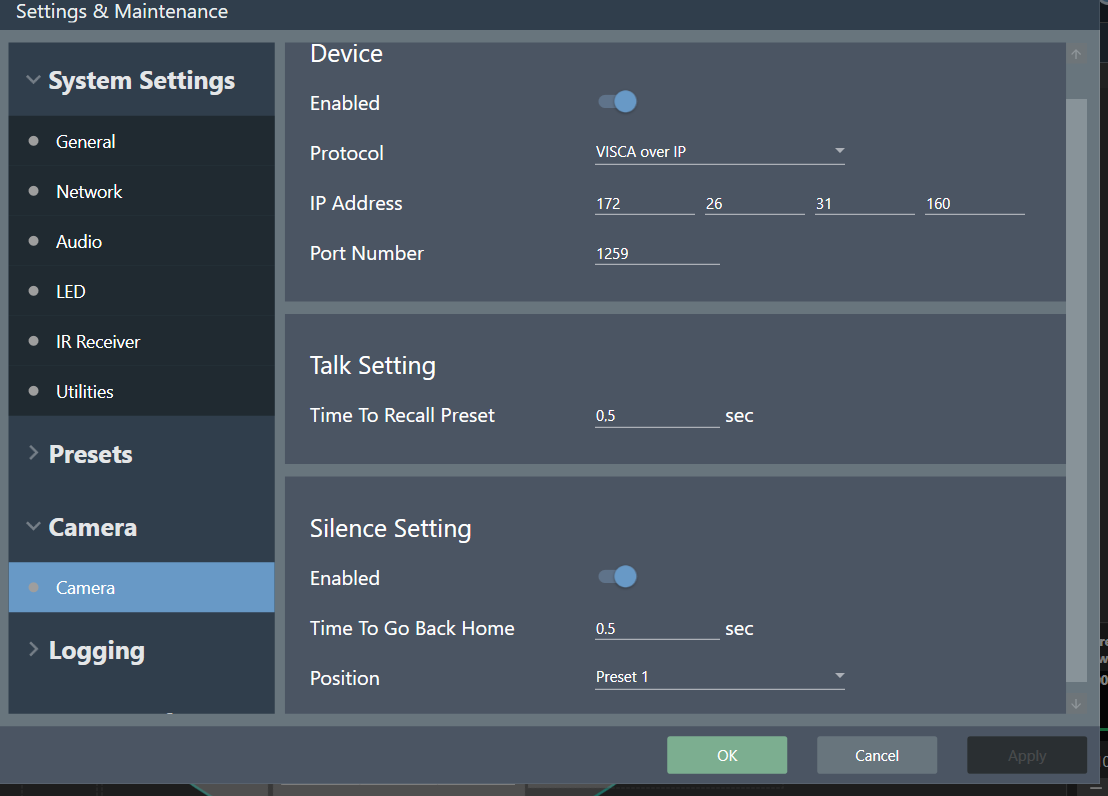
To set up the calling of the presets in the camera you have to go into the menu Settings & Maintenance and add the camera by filling in the IP address and the VISCA communcation port. The Avonic Visca over IP port is set to 1259 by default (want to know more about Visca and Avonic PTZ cameras? Take a look here ). See screenshot below.

After you have installed the camera to the microphone the actual important stuff comes along, because there are some settings that heavily weigh on the quality of the video output. These settings include the delays on how long the microphone will linger before activating a camera preset or when to send the camera back to the default home preset. These settings include a 'Talk setting' and a 'Silence setting'.
Furthermore the camera itself has quite some influence on how to activate and handle these presets. Usually people ask us to make the cameras move as fast as possible in a given situation, but in this case this is definitely nót the desired result.
The people on the receiving end of the videocall do not want to see an image that moves back and forth at lightning fast speeds.
Luckily the smart people of the design team have thought of this and made three independant preset speeds for Panning, Tilting and Zooming while executing presets in the camera.
All you have to do, is log into the webinterface of your Avonic PTZ camera and lower those preset speeds under the System Tab. By default, the IP address of an Avonic PTZ camera is 192.168.5.163.
In the screenshot below (comes from on of our USB PTZ cameras that are equipped with Visca over IP control, the AV-CM41-VCUC-B) you can see these adjustable speeds.

A small demonstration of the live result when the camera is connected to the microphone:
As Audio-Technica is an official Avonic Technology Partner we strive to provide you with the best service possible. If you encounter any issue installing these two great brands together, feel free to reach out to us, either by email or via phone at +31157112712