Getting started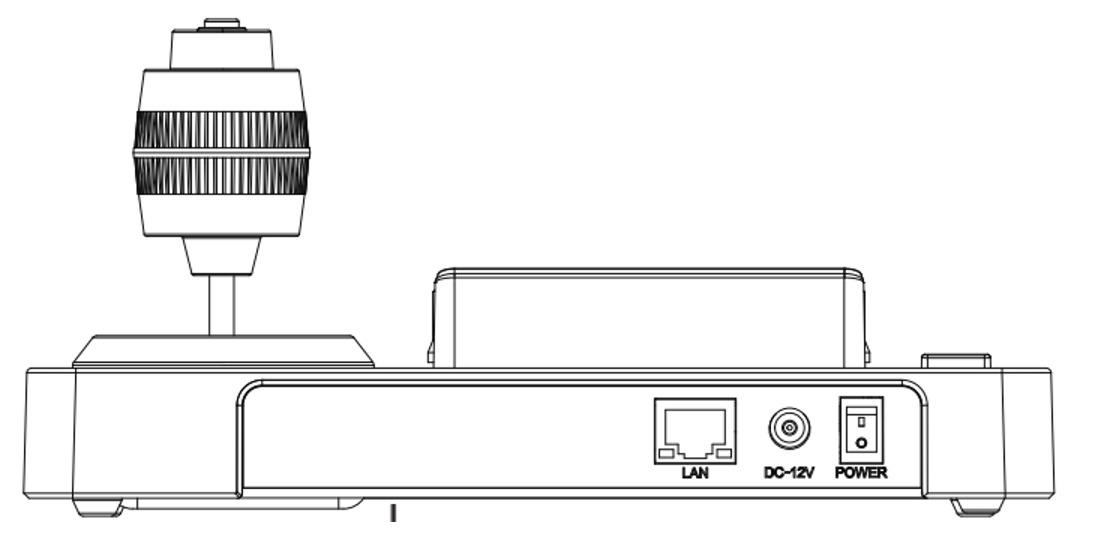
1. Connect the controller to a power source, either use the supplied PSU or use a PoE connection.
2. Turn on the CON200-ip by flipping the power button in the 'ON' position
3. Enter the menu by pressing the MENU button
4. Use the joystick to navigate down to the network settings, press the top of the joystick to enter
5. Enter your preferred network settings, a reboot is not necessary after a change
6. The CON200-ip is now ready for you to install cameras
Adding a camera manually using the button panel, basic settings
1. Press the menu button and select Device Management
2. Scroll down and select Add a new device
3. Scroll down to Protocol and select 'Visca TCP'
4. Scroll down to IP address and enter, delete the pre-filled values by pressing the Delete button repeatedly
5. Once the fields are empty, fill them with the IP address of the camera, in the following way: 192.168.005.163
6. Scroll down and select the Port. The standard Visca TCP port on Avonic PTZ cameras is 1259
7. Scroll down and select save the settings
Adding a camera manually using the button panel, advanced setting
1. Press the menu button and select Device Management
2. Scroll down and select Add a new device
3. Enter the preferred Device name, toggle between capitals and lowercase by double tapping button '1'
4. Scroll down to Protocol and select 'Visca TCP'
5. Scroll down to IP address and enter, delete the pre-filled values by pressing the Delete button repeatedly
Once the fields are empty, fill them with the IP address of the camera, in the following way: 192.168.005.163
6. Scroll down and select the Port. The standard Visca TCP port on Avonic PTZ cameras is 1259
7. Scroll down and select the stream url for the preview possibility. On an Avonic camera the url is as follows:
rtsp://IP-address/live/av0 for the main IP stream, use av1 for the secondary streamif the camera is used in an IP video streaming environment
8. Scroll down and select save the settings
Adding a camera manually using the WebUI
1. Log into the webserver of the CON200-ip, the default IP address is 192.168.5.173 and the credentials are admin/admin
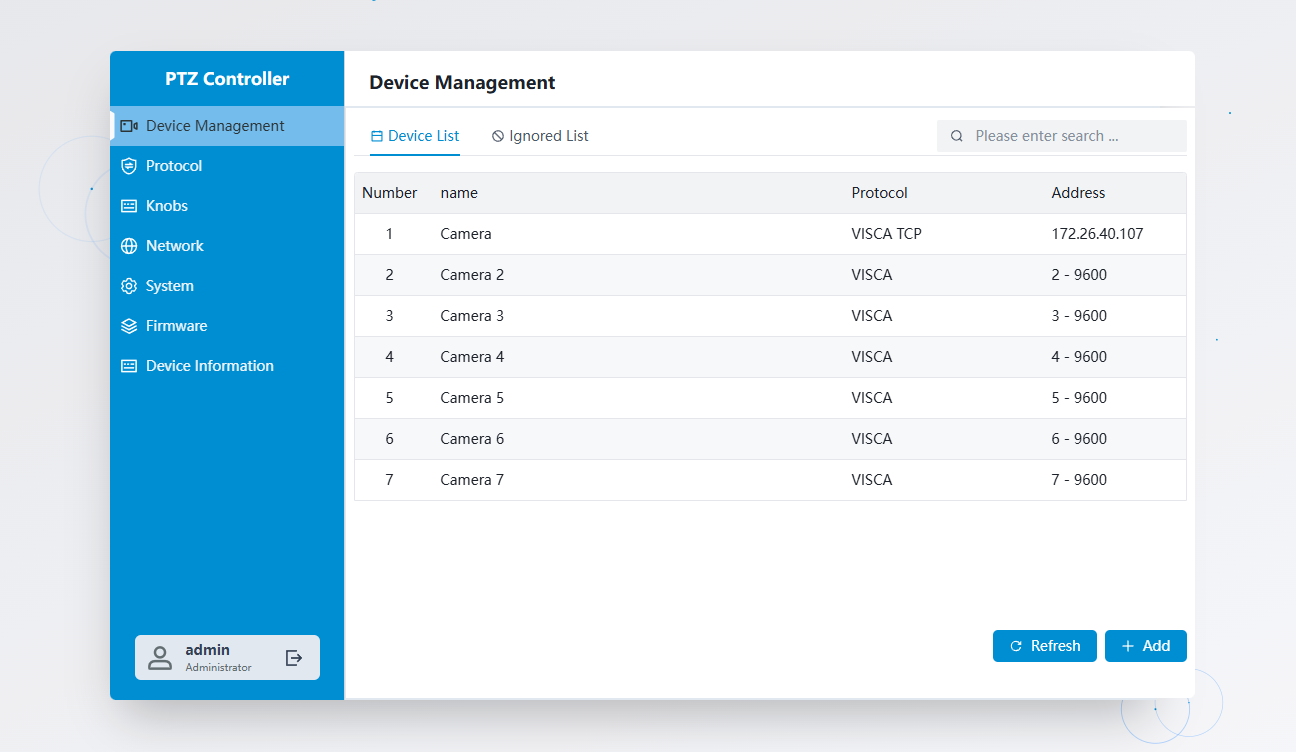
2. Click on the camera that you would like to edit or press the button + Add at the bottom of the page to either edit or add a camera.
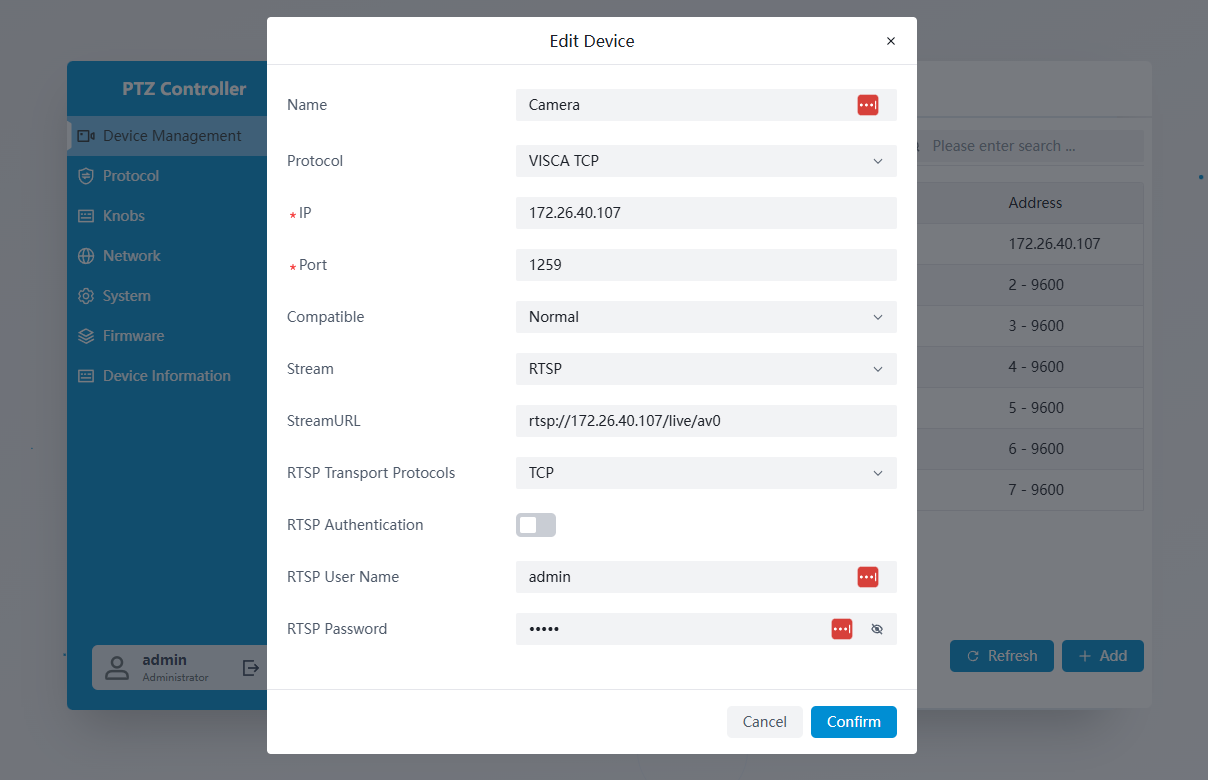
3. Fill in all the values and click confirm.
Controlling multiple cameras
Press CAM and after that the number of the camera that you want to control.
Do this each time you want to switch from one camera to another.
Preset Operation mode
The CON200-ip is able to use two preset modes. The first preset mode is able to use 10 presets for each camera, instantly.
The second mode is able to use 255 presets for each camera.
The difference between these two modes, is the fact that when the 255 presets mode is chosen, you have to press enter after selecting the preset number you want to call.
To switch between these two modes, go into the Menu and select 'knobs', scroll all the way down to Keypad numeric code and select either 10 or 255.
Function keys

By default the F1 ~F4 buttons have the following programming. They are grouped in pages of 4 at the bottom of the display. The F4 button only has a click-option as the rotary function is reserved to rotate between the pages of functions.
1.1 Focus Speed
1.2 PT Speed
1.3 Manual Focus
1.4 Autofocus
2.1 Iris Up/ Down
2.2 Shutter Up/DOwn
2.3 Gain Limit
2.4 Exposure Mode
3.1 Track On / Off
3.2 Tracking mode
3.3 Tracking Composition
3.4 No Command
4.1 Backlight Compensation ON/ OFF
4.2 2D-NR (OFF 1-7)
4.3 3D-NR (OFF 1-7)
4.4 No Command
5.1 H-preset speed
5.2 V-preset speed
5.3 Z-preset speed
5.4 No Command
6.1 One push trigger
6.2 WB Rgain
6.3 WB Bgain
6.4 WB mode
Preview
The CON200 has the option to show the IP video stream of the camera that is selected. To view the camera's output, press the PVW button and the display will change from control to a viewing monitor. Press the PVW button again and the control screen comes back.
Search
The CON200 is equipped with a search button with which it can perform a quick network scan for Avonic cameras that are present on the network. From the generated list you can immediately add cameras to the camera list.